Playing with Raspberry Pi 4B 4gb
I have a bit of experience, not at a very deep level, with previous iterations of the Raspberry Pi, (2, 3B, 3B+, 0, W), and they have *all* been fun to mess around with. After a couple years, my interest waned, and I kind of moved on to other things, but just the same ordered one of the Raspberry Pi 4’s last May, (2019), with 1 gb of memory to eventually play with. Unfortunately Heidi’s Mom fell on June 3rd and that project also got put away for a spell.
Now, winter is approaching, with those long nights – and my friend Phil, over in Japatul Valley, mentioned he was thinking about taking on the Raspberry Pi 4 just as a relatively inexpensive winter project to get into – I was inspired in turn to kinda join him and that will give us something we can share back and forth on Ham radio this winter, kind of supporting one another. My experience has been more recent than Phil’s with the RPi’s so, after both of us purchased the new, (as of September), Canakits for the Raspberry Pi 4B with 4 gigabytes of memory, I kind of took the temporary lead to help test and get things installed, up and running.

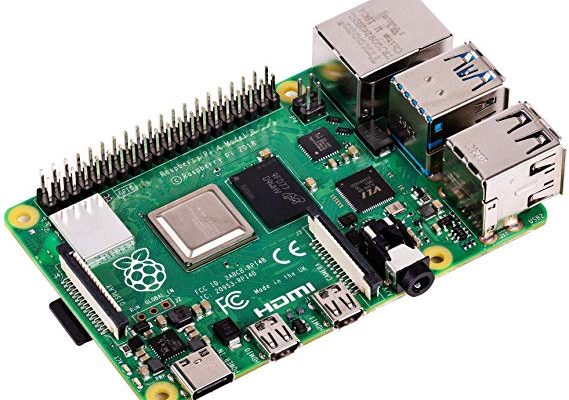
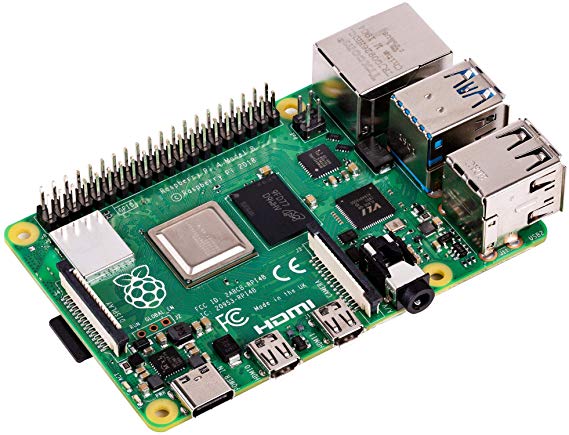
You will notice the power, and two HDMI ports installed on the new RPi4 board create a different enough form factor that most of the previous cases will no longer work with this one – some may, but the case provided by Canakit in its associated kits works perfectly. This picture does not show the, (IMO *necessary*), three heat sinks provided by Canakit nor their fan that comes with it. About all I can say is this new one runs hot and you will need to take care of that. In my case, Canakit took care of it, (and me).
There is a lot of “stuff” about the RPi 4B that has been written and published on blogs and Youtube between May and September that was less than complementary – but like always, they have continued to work on both the firmware and software after this particular Single Board Computer, (SBC) was released, and both Phil and I have been very impressed with our initial findings. Of course, we both have installed the Canakit Heat Sinks, case, and fan on our respective RPi4s.
Phil is a writer, and pretty much of a fan of both Linux Mint and the Open Source LibreOffice Suite, (kind of like getting a more or less work-alike for Microsoft Office, but free). I was very pleased to report that, using the NOOBS installation software that came on the Micro SD Cards as part of the Canakit offering, installed the FULL version of the Raspbian Operating System, along with a pretty full set of selected programs which make it a kind of “Desktop Version” of Raspbian – and that included installation of the latest available version of the LibreOffice Suite!
That was a few weeks ago now, and Phil has had time to pretty well wring out the word processor program, (LibreOffice Write), and with the addition of an open source spell checker and thesaurus, this latest little offering from the Raspberry Pi community makes a bang-up little word processing machine if nothing else. About all you need beyond the Canakit package from Amazon is a HDMI screen to plug it into, (or learn how to control it headless from another computer, which I will get to in detail with later on in another blog post), plus a keyboard and mouse to get it set up. If I never use it for anything else than a dedicated word processor – it is already worth every penny I spent on it. Cool!
As time permits, I will try to write up a few suggestions, observations, and so forth from this new “project”, but for now it is quite literally a toy, looking for a project to make it a useful tool other than as a word processor. I’m going to have a lot of fun this winter playing with my new “Raspberry Pi 4b 4gb Toy”. 🙂
Hint: I already know I am going to wind up focusing on all of the various Ham-related projects out there for the RPi4 and will pick and choose which of them to tackle “next”. But there is a lot of more general stuff to look at too. Will try to go back and look at my notes to kind of outline what I/we have done over this past few weeks. 73, dave/W6TUX
Links to some great references:
- Raspberrypi.org
- Everybody needs a starting point, and you won’t find better if you are a beginner than using the combination of the above web site and the plethora of videos available on Youtube these days. “Teach, Learn, and Make with Raspberry Pi” is the title of their opening page. Good Stuff – be sure to check out the available documentation there and their excellent forums which cover more topics than I will ever be able to get into.
- RaspBerrypi Forums on installing LibreOffice Spell Check, (& Thesaurus)
- Be sure to install the US version rather than the Great Briton (GB) version I mislead Phil into doing! 😀
- Canakit for Raspberry Pi 4 4gb Starter Kit (on Amazon)
- The link above is current as of this writing for their complete starter kit – there are cheaper offerings by Canakit, but this one literally has everything you need to get started – if you have an HDMI display, keyboard and mouse. I have to say, it is literally a “snap” to put together. No more screws, the board and little fan just snap into the new style case for the RPi4. HINT! First, carefully install the provided 3 adhesive backed heat sinks on the board before putting it in the case. Be SURE to keep the provided Micro SD card OUT of the slot on the bottom of your RPi4 board while assembling it in the case. You could damage the card. When everything is assembled, you may THEN stick the card in via the provided slot in the bottom of the case.
- Logitech MK270R Wireless Keyboard and Mouse Combo
- Also from Amazon, I can vouch for this, relatively inexpensive, wireless keyboard and mouse working *very* well with the RPi4 – in the older days you had to have a wired keyboard and mouse to install your RPi – not so any more. The above combo worked perfectly with setting up my RPi kit and the fact it can be moved to other devices simply by moving the USB adapter is very cool too. I sent the following in an eMail to Phil after the first use:
“The keyboard takes two aaa batteries and the mouse a single aa – nice of Logitech to include all three batteries in with the hardware. Put in the batteries, and put the dongle in one of the “old” USB slots, (not the newer UCB-C slots). Hooked everything up – powered up the Pi and doggone if I didn’t have a usable mouse right off the bat. No longer a need to first use a “wired mouse”. This was booting up with the provided NOOBS SD card, but I suspect it would work the same way with a self prepared Raspian SDHC bootable SD card.”
Of course there are many, many other good places to find more information on the RaspberryPi. Here are a few more, in addition to RaspberryPi.org:
- Raspberry Connect
- Ham Radio Packages <–I knew there was a list out there somewhere
- Adafruit
- The PiHut
73, dave/W6TUX