Ham Radio – Our Portable HF Dipole
Originally posted Sep 27, 2016 on old blog.
First and foremost, I absolutely get a kick out of playing with Amateur Radio Antennas of just about any kind, configuration, etc. It is part of the hobby that just appeals to me. Have spent many hours on-line pursuing new thoughts, ideas, etc. Learned early on to avoid paying too much attention to Commercial antenna “claims”, marketeer speak, etc. and started looking at what is working for other HAMs, or has worked for them in the past.
One of the projects that appealed to me was reading of the “BuddiStick” antennas and researching other designs that later grew out of that original project – that is, until the day I got a gander at the rig WA6FFT was using up on Mount Laguna. A very experienced and avid portable operation/CW/QRP enthusiast, Phil was kind enough to lower it for me and go over the few number of components and explain how it was simply “Handy”. I was sold!
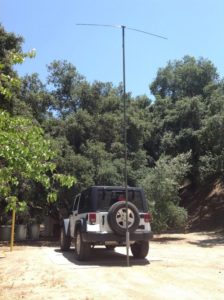
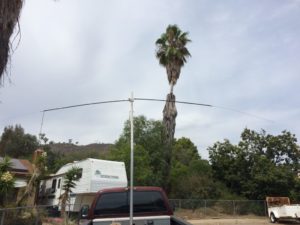
Phil’s “Buddistick” work-alike horizontal HF dipole.
The photo above was sent by Phil at my request, (I’ve whited out his license plate), inquiring about his description of it on our local 2m repeater. Later, when I got to “see” it in operation, there was no doubt that would be a very handy rig for Heidi and I to have for portable operation. Something you could literally run up from just about anywhere, and be “on the air” in just a few minutes. We have other “wire antennas” we will use, (Shorty 40 Linear Loaded dipole, Sotabeams linked dipole, Sotabeams end-fed vertical), and yes any “loaded” antenna is a compromised antenna, but I could picture us driving through the mountains, spotting a likely turnout, and being on the air right after pulling in. Cool! It was time for me to put on my old “thinking cap” and decide how I was going to adapt it to our own particular setup.
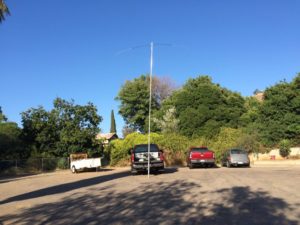
Phil uses an old military portable mast he acquired years ago, (and I’m keeping my eyes/ears open for one), but I figured it was probably adaptable to the masts we already had for portable operations, and that turned out to be true – (though not quite as handy as Phil’s rig). One of the most attractive things to me about this setup over our wire antennas is the lack of “footprint”. You could use this setup in a crowed parking lot, campsite, or wherever in a relatively unobtrusive fashion for those around you.
The first step involved a run to our local Ham Radio Outlet for the little MFJ-347 mini-dipole antenna mount, however, researching their web site, I found purchasing the MFJ-2240 package would provide both the mount and a set of 7Mhz “Hamtennas” at a reduced price over purchasing the components individually. Then I could add pairs of Hamtennas for each band as time went on. (At the time I am typing this, we now have the 20, 40 and 80 meter bands covered, and intend to keep adding the relatively inexpensive pairs for whatever bands we want to work).
Noting the bolts & nuts provided on the antenna mount are metric, it was off to our local Home Depot where, (with help from the manager), I was able to locate a mess of stainless steel wing nuts the right size to replace the nuts, (I bought spares – too many things get “lost” in the field). That step makes the initial setup and tear down far easier. While there, I picked up a little “ratchet wrench” the correct size for the bolts, to keep a dedicated tool right with the rest of the components all the time.
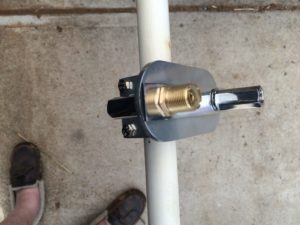
MFJ-347 mini-dipole mount
Each set of Hamtennas required manual tuning – the stainless steel “whips” that stick out of the loaded section of each antenna are intentionally quite long – and running the extra metal inside the loading coils has a negative impact on their functionality, so you literally have to cut them off – then, when you have the antenna set with little allen screws, not more than an inch or so extends into the loading coils. This is a time consuming activity, requiring a good antenna tuner, but it should only have to occur once. Because I am an Amateur Extra, and have privileges extending lower into each band than Heidi’s current General license, each set was tuned for the lowest Standing Wave Ratio (SWR) to be at the low end of the General “voice” frequencies. With that extra effort, I was able to achieve a setup suitable for both of us.
It really is quite a process – but well worth the effort:
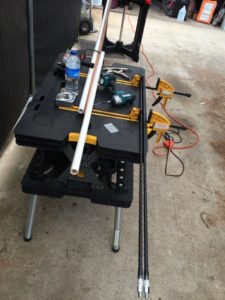
Back-and-forth tuning process 1
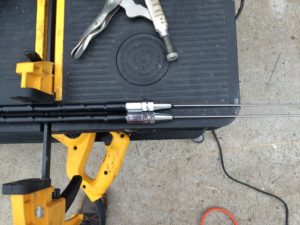
Back-and-forth tuning process 2
Back-and-forth tuning process 3
Back-and-forth tuning process 4
Up to this point in the photos, I had been using our modified Harbor Freight push-up flagpole – but also wanted to be able to use our MFJ-1910 “33 Foot Twist Lock Telescoping Fiberglass Pole” with the horizontal dipole setup, however, it being fiberglass, I needed a way to protect it from the “clamp” on the mini-dipole mount. Finally realized I could simply use PVC pipe, slot it, then let the clamp squeeze it onto the mast. Worked like a charm:
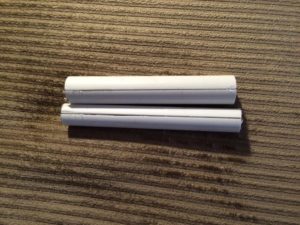
Slotted PVC sleeves – later I widened the gap on each one to about 1/8th in.
Up to this point, I had been attempting to use a “current balun” mounted just below the antenna, without success. Phil had told me the HAM he originally copied had mentioned the need to use a MFJ-915 “line isolator” in-line with the feedline, up close to the antenna. Being the honest soul he is, Phil said words to the effect “I don’t really understand why, but I put it on there and darned if it doesn’t seem to work”. 😀
Remembering that conversation, I had to call Phil to remind me of the part number, HRO had them in stock – put it in-line at the antenna end of the feedline and “darned if it didn’t work” for me too! 😀
Being the inquisitive soul that I am, (Virgo ya know), I did some further research. Turns out the MFJ-915 is really an “Unun” – OK – more research:
BALUN v/s UNUN
A balun matches a balanced load to an unbalanced line, but it can also do other useful things. A current balun can present a high impedance to common-mode signals, which will help reject noise. Common-mode signals are the same on both conductors, so are not “balanced” or differential.
An unun is an impedance transformer, usually 4:1 or 9:1, which matches an unbalanced antenna to a feedline. A 9:1 transformer is often used for an end-fed half wave antenna.
So I guess what I was actually facing was that I had created a compromised “unbalanced antenna” that needed to be matched to my feedline – that’s my cactus and I’m sticking to it! 😉
Reference: (in PDF) A Ham’s Guide to RFI, Ferrites, Baluns, and Audio Interfacing – Revision 5a 5 June 2010 – by Jim Brown K9YC