RPi4 – The easy way to back up your Micro SD card
While I had previously mentioned installing the “gparted” package for “Graphical Partition Editor”, as a package I want to learn in detail soon, I want to point out there is a wonderful little tool provided in Raspbian’s graphical interface/menu system.
Raspberry | Accessories | SD Card Copier
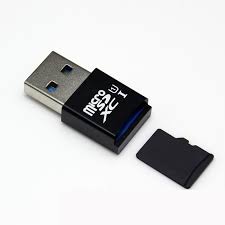
If you are using the CANAKIT Raspberry Pi 4 4gb Starter Kit mentioned before, there was a little USB Micro SD card adapter included with the kit. That adapter serves as both an SD Card writer, as well as reader. You can put a Micro SD Card the same size as the one that came with your kit in it, (have a peek at the image on the packaging to see the right way), then plug it into an open USB-C port on your RPi4 – the operating system should recognize it and “automount” it for use.

It makes no difference what was on the card or if it was showing up as “corrupted” on a linux or windows computer – it is probably still good. Regardless, *everything* on it, including old partition table data will be destroyed by using the above utility.
You will first want to load the above “SD Card Copier” program and just “Look” at what is under the drop-down arrows for both the source spot and the destination spot. Your SD Card already on the motherboard should be fairly easy to identify and, unless you have added something is probably the top selection available, (it will probably contain “/etc/mmcblk0”). Have a look at what is currently under the destination slot FIRST, the plug the adapter with the new SD Card into an open USB-C slot and look again at the list under the destinations. What you want will be the new entry, (for me – mine ended in “sdb”). Yes, I am being kind of anal here – please don’t ask my why I know that doing this stuff wrong can result in one overwriting what was supposed to be his/her source disk/card. ::cough:: ::cough:: 😉
The SD Card Copier utility program will first write a duplicate of the partitioning data from your source card to your destination card, then format the partitions, then finally copy over an exact image of what is on the source. Very, very cool stuff – but you really want to be careful on your first use of this. Afterward, you will have a wonderfully full backup of exactly where your system was at when you ran the utility, and you will feel a lot more secure. You can always get your system back by simply swapping in that SD Card if you run into unexpected “problems” and need to go back. More GOOD STUFF IMO.
73, dave/W6TUX
On the Raspberry Pi Blog – there is a page entitled “The latest update to Raspbian” that covers this and other items in its content with images. Most strongly recommended reading.