Solar Cooking – Navy Beans and Ham
Originally Posted Apr 21, 2014 on old blog
One of the best things about enjoying a big ham dinner is making effective use of the leftovers! Heidi baked a fairly large, spiral-cut, ham in the oven yesterday, (Easter Sunday) – and after dinner I immediately started scheming on ways to use the rest of it for some outdoor cooking. Decided it is way past time to break out the old All Season Solar Cooker (ASSC) as today and Thursday were supposed to be *excellent* “Solar Days” out here in East San Diego County. This is our original ASSC, put together under Jim La Joie’s watchful eye, almost 3 years ago. I still haven’t had to do any maintenance on it, other than wipe dust off of the reflective surface.
Picked over about 1/2 lb. of dry Navy beans and set them up to soak in water overnight. Got up early, (for me), at 6AM figuring I would have coffee and start setting up. One of the beauties of the ASSC design is that it can be configured/adjusted to take advantage of early morning and late evening sunshine – unlike the Solar Box Ovens which are limited to about 4 – 5 hours of cooking time. With the ASSC you can cook any time there is sunshine.
Imagine my surprise when I walked out to our (hopefully earthquake-proof) steel shed and found the morning had brought in low clouds and fog thanks to a very thick marine layer. No problem, knew it would just delay my “schedule” by a couple hours while old Sol burned it off. Sure enough, by 9:30 there was more than enough sunshine to get started. I set up a portable work-bench to use as a table out front. We have an 11 mo. old Shepherd pup that, most assuredly, would be curious and might get hurt. (I cannot stress enough – solar cooking can be dangerous around pets and small children. We are talking real cooking temperatures with the ASSC and you MUST have due caution!
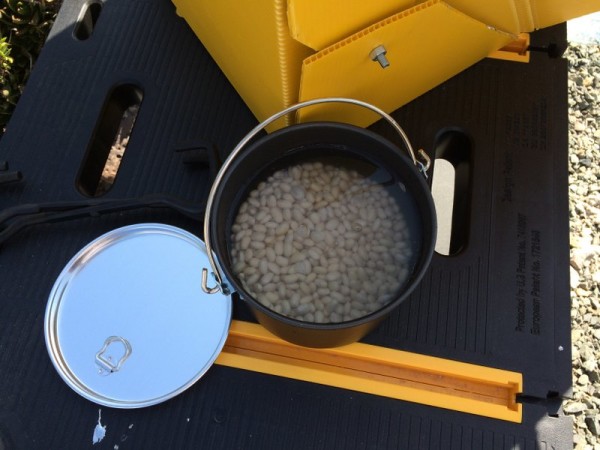
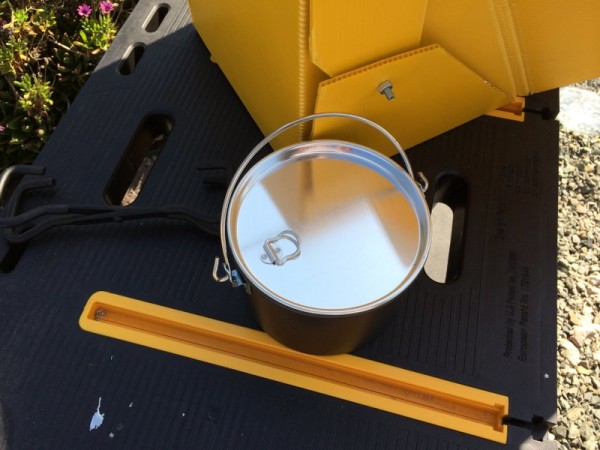
Set up the ASSC on the bench, then, (after draining), put the soaked beans in a 2 Qt. black anodized “Bush Pot” recently purchased from my friend, Alan Halcon, at his on-line “Outdoor Self-Reliance” store, along with a 4 Qt. version. Covered the beans with about 1″ of cold water. We already own one of those pots, but Alan’s price was so much more reasonable than what I had previously paid, I just couldn’t resist. 😀
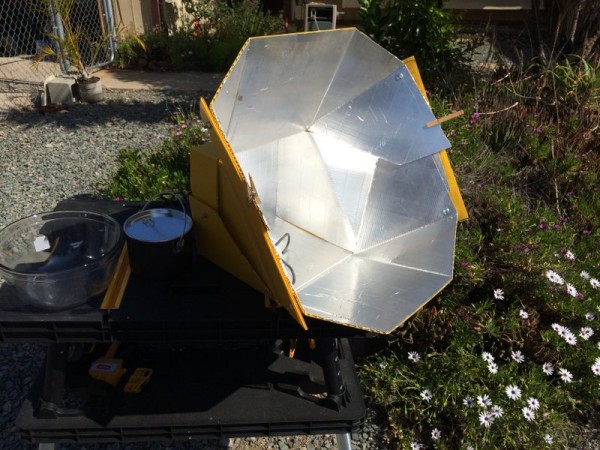
All Season Solar cooker set in “winter” mode to warm up – trivet was uncomfortable to handle after just a few minutes. Decided the sun had already climbed high enough to flip it over for “Summer Mode”.


Jim La Joie’s ingenious little “Sunsight”… You simply use the shadow of the nail head to show when you are precisely aimed at the sun. So intuitive to use its hard to believe something so simple can be so effective.

Wow, I need to get a move on, 10 minutes and its getting hot out here!

Using our same old oven-proof glass pie plate and inverted bowl to create the cooking chamber. Hard to believe what a dramatic difference they make… On hot summer days, with little to no wind, you can get away without this set up – also you can use large oven bags when carrying the heavy glass is inconvenient – but for home use, or a “civilized base camp”, you just cannot beat this combination. The increased weight of this cooking chamber additionally helps the ASSC remain stable when its a little windy.
After taking that last picture, it dawned on my that I had assembled the ASSC “wrong” in that those large, lower “flaps” should be outside rather than inside. It is not affecting the heat in the cooking chamber, but does make adjustments a little “stiffer”. Not a real problem so I’ll just leave it like it is for now, go inside and watch Jim’s assembly video again. (I haven’t peeked at it for a couple of years). <blush>
That pot was in place at 9:40 AM. Time for another cup of coffee, then come back out about every 45 minutes or so to re-aim the ASSC at the sun. After you have used these for a while, you tend to “pull a little lead” on the sun’s current position to extend the time between adjustments. For beans, I like to keep after it to gain maximum temperature and shorten the cooking time.
12:30 PM, added diced ham, onion, and our favorite spices, (a little Chili powder, Cumin and Garlic powder). Had to move workbench to allow for our large Palm tree out front. My estimate of about 4 hours is a gross approximate. The beans are done when they are soft…

Our local PWS is reporting 83.5 ° outside. Have to admit, I got into “blogging/facebook/etc.” and let the palm tree shadow interfere for about a half hour. <blush> Moved the bench to its final destination and adjusted for the sun angle. At 2:40 PM Heidi and I went out for a taste test, agreed its going to take a while longer to get to the consistency we enjoy – also needed salt and a little pepper.
Of course, then I got busy replacing a headlamp bulb on Heidi’s Hyundai, ran into problems (driver’s side is a pain), and forgot all about the beans until I got the car fixed and everything put back together. Heidi just tested and they are certainly done now – another beauty of cooking with a solar reflector oven, its near impossible burn anything. Bottom line, they are good and we will have them as a side dish with supper. Fun day, except for the part playing auto-mechanic…
p.s. Supper was great! Fried ham with potato salad, Navy beans, sweet corn, olives and cucumber/onion salad on the side. My beans were not as good as Heidi normally cooks, but I’m working on it! Next time will thicken the soup with a little flour water, and not be so chicken on adding the spices. Hit my bowl with about 6 splashes of Tabanero Hot Sauce and I was fine….