Some thoughts on storage and stuff
Originally posted Mar 24, 2011 on old blog
I have to admit it, the tragedy associated with the 3/11 earthquake and tsunami striking the people of Japan has affected me very deeply. Reading the concerns and recent preparation by others living on the “ring of fire” inspired me to get part of it out by sharing a bit on our own preparations/solutions.
“Where do you keep it all”?
If you enjoy camping and outdoor cooking – one of the problems that eventually presents itself is where everything gets put when you aren’t using it? Here around the old Pondee we have discovered that you just cannot have enough storage space, cabinets, etc. – so over the years we have continued to expand it.
My first project here, now well over 20 years ago, involved expanding our “Attic space” by constructing a storage area across the rafters in the tallest spot of our garage using 4×8′ sheets of 3/4″ marine plywood – then adding a pull-down ladder we picked up from Sears. Then one entire wall of our “two-car” garage was dedicated to a very long work-bench with storage both underneath and open shelving above.
We have plenty of ground, so my son and I erected a 10×10′ steel shed, (also from Sears), out in one corner of the back yard and there is a smaller steel “tool shed” next to it for the lawn mower, and miscellaneous garden tools, plus a couple of important items I will get into later on.
At one point, we “inherited” a very large, heavy, steel workbench with a shelf – since our garage is/was quite “deep”, we put that facing inward to the washer, dryer and water heater, creating a 3.5′ wide “aisle” we call the “wash room” and plenty of overflow storage for “she who must be obeyed”. 😉 I added more steel shelving for her between the door leading to the kitchen and the “wash room”.
We soon filled up all of that, and Heidi needed a “larder” to augment the cabinet space in our kitchen. (Did you know that kitchens seem to “shrink” as the years go by?) So I picked up an idea from our daughter and purchased a “ClosetMaid” product from our local Home Depot.
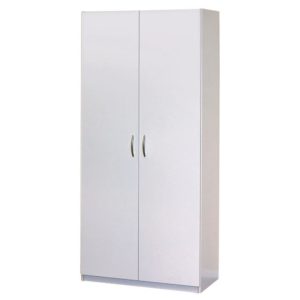
ClosetMaid 29-5/8 in. 2-Door Wardrobe Cabinet
These are relatively inexpensive, (certainly cheaper than I could build it), and all I had to do was add a bit of shelving at heights she specified and an internal wooden skeleton to sturdy it up for heavy canned goods, etc.
Note: We live in “Earthquake Country” so I immediately clipped it to the wall with “L” brackets screwed into wall studs. I do the same thing with tall furnishings like our book cabinet.
Ever since we moved in here, we have had some form of travel trailer, or RV. (Currently a 30′ 5th wheel). We always have kept them right here on the property, and they have all invariably been fully stocked and ready to go. (We also live in wildfire country). In the winter of 2003, we had quite a scare with wildfires here – and I became more conscientious about improving our emergency preparedness. In 2004, “Hurricane Charlie” passed right over the area in Florida where my son and his family lived at the time – and after that scare, I became even more of a “bug-a-boo” on emergency preparedness. Hurricanes Katrina and another round of California wildfires in 2007, followed by Hurricane Ike in 2008 served as reminders that I needed to do even better in terms of disaster preparedness and emergency planning – and then there was my wonderful “hobby” (outdoor cooking) that also needed storage. (You notice I haven’t mentioned our own earthquakes over the years? Like the one that happened during our family gathering for Easter Sunday on April 5th, 2010?)
Bottom line, we needed even more storage – but the cost of building material has become such over the years that last year I decided to go “pre-fab” again. Sure enough, another search of Home Depot “ClosetMaid” products provided a relatively inexpensive answer.

ClosetMaid 48 in. Multi-Purpose Wardrobe Cabinet
I bought two of them, which our daughter and son-in-law helped to put together. (I had a flare-up on my back problem and really appreciated the assistance). Once again, they required fabrication of some additional internal shelving and “beefing up”, but they are now placed along the wall opposite my huge workbench out in the garage and have really worked out as a great solution for much of our emergency preparedness items, especially long-term storage for food. They have been elevated 4″ off the concrete floor using recycled (heavy duty) shipping pallets. Yes, they have been secured to the wall studs out there with very large “L” brackets. 8)
A few final thoughts: Remember that tool shed I mentioned earlier? It is out in an area where no trees could fall on it, (for that matter we no longer have any trees here than could fall on the house). There are shovels, a 5′ steel “destruction bar”, and a couple of pry bars out there along with some other basic hand tools. If the Pondee fell, we would have a means of digging important “stuff” back out.
I am a voracious reader – one of the absolute best books I own related to this little “article” is “Handbook To Practical Disaster Preparedness For the Family” by Arthur T. Bradley, PH.D. – but you have to use your own head/experience/skills.
Last winter, I bought a 12×14′ steel shed that will augment the older one already out there. It will be quite a project, and I have already enlisted the help of our son-in-law to erect it. You just cannot have enough storage. 8)