Our Roll-up J-Pole Antennas
Originally posted May 9, 2016 on old blog
This one is picture intensive, I apologize if this page takes longer to load but it should be worth it if you are interested in building one from 450 ohm window lead.
Last Christmas, several members of our Ham radio club were setting up over at Sprout’s Market in Santee, CA. to give customer’s children an opportunity to talk to Santa on a Ham radio. While Heidi and I couldn’t directly support the event, our eldest granddaughter went over to help steer the kids toward Santa’s Elf who had a portable radio set up. While getting ready, the “Elf” was having trouble communicating with the ARCEC 2m repeater – but our friends from Crest came to the rescue. They provided a Roll-up J-Pole Antenna to use in place of his mobile antenna and all problems went away. With the new antenna simply tied up next to a window – still inside, he was literally BOOMING into the repeater and for two days the event was a tremendous success and one Heidi and I fully enjoyed monitoring!
Quite naturally, I *HAD* to find out more about that Roll-up J-pole antenna. They can serve a great purpose as an emergency antenna for portable operation, you can toss a line over a branch and draw them up to a decent height out in the field, and even use one indoors! Speaking to our friends off-line, I found that theirs were/are constructed from 450 Ohm ladder lead, rather than the 300 ohm stuff most folks use for this purpose. Nothing wrong with the 300 ohm homebrews, but my mind kept going to that BOOMING signal and determined I would build two of them like our friends for Heidi and I.
Generally, I followed this design found on hamuniverse.com:
The 450 OHM Ladder Line Slim Jim Antenna
By KE4NU – Alan Wilson, Victor, MT
However, followed some important recommendations by our friends to avoid the most likely points of failure, and added a couple of my own to gain even more durability. I acquired our 450 ohm ladder line from the good folks at palmettoantennas.com via an on-line purchase and received excellent service. (They are also a great source for other Ham-related wire as I soon found out).
Hopefully this series of pictures will help if you want to try this:
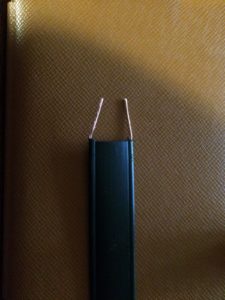
Started by stripping wire at one end, then doing the same at the other end looking for a total length of 58″
Slight modification – I left a tab sticking out that will have a hole for hanging the antenna
From the other end, will need to strip wire centered 4″ from the end to provide for tuning/attaching coax
I simply whittled the insulation off with a very sharp knife. This is a bit tedious.

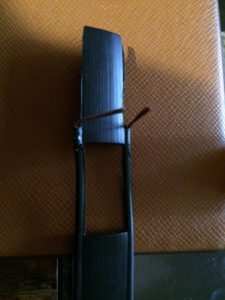
Wires tinned, then soldered together at top
More tinning and soldering
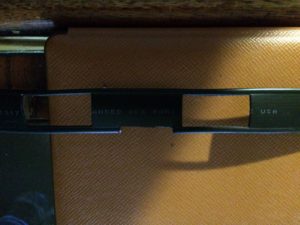
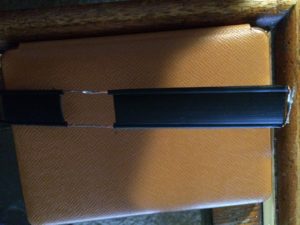
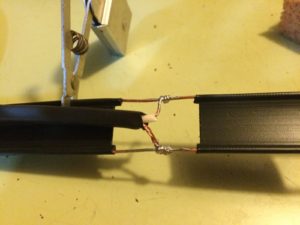
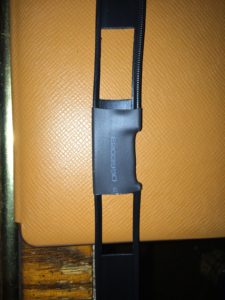
19″ up from bottom, cut a 1″ gap on one side of the wire – that side will be for the coax shielding to be connected to
After stripping off coax insulation, pushed down the shielding mesh then used a large wooden pick to separate the wire – then worked the center conductor through that gap.
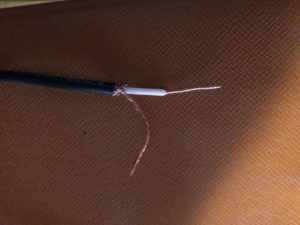
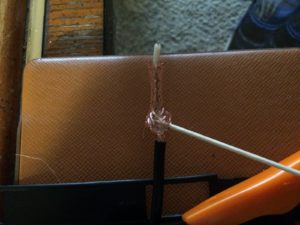
Twisted the shielding, then stripped inner core back about 3/4″
Pre-positioned 1/4″ shrink tubing around coax to provide strength – and 3/4″ shrink-tubing that will eventually cover the connection. Note wires just twisted to provide for tuning by moving connections up/down.
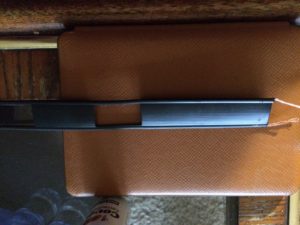
After tuning, soldered for permanent connection.
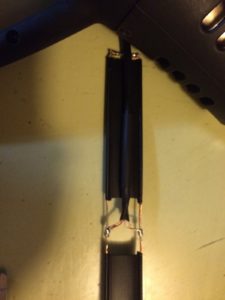
Used heat gun to shrink tubing around coax.
Used a hot glue gun to bond coax to ladder line, (as recommended by our Elmers).
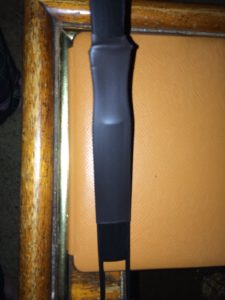
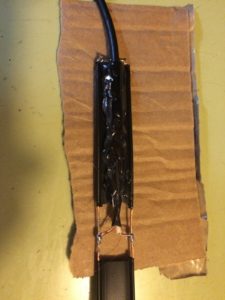
Finished up with shrink tube covering entire area at the top – should be a lot more durable this way.
Probably unnecessary, but put a bit of 3/4″ shrink tubing over gap to add just a little extra strength.
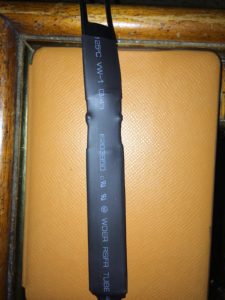
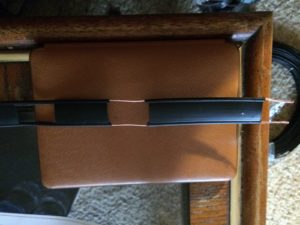
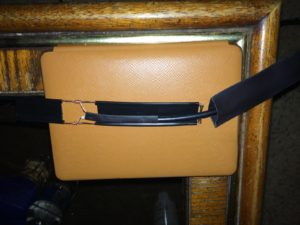
This is the bottom where the coax is now bonded to the ladder line – It really doesn’t look bad at all.
…and that is it. As I said earlier, I built two of these. One is rolled up, and placed in Heidi’s Go Bag – the other is currently hanging on the wall in our ham shack. Any time there is a thunder/lightning storm coming through our area, I physically disconnect all of our antennas and connect the roll-up j-pole to our “base” two meter radio, where I can continue to monitor the local repeater and talk on it without fear of lightning.
Edited: When our eldest grandson, Ryan, got his Technician’s license while on vacation out here from Florida, we sent him home with a new Yeasu FT-60R handheld radio, and Heidi’s roll-up J-Pole, (they have *lots* of lightning in FL). So I made two more, one to replace Heidi’s, and the other to send to a good friend in Southeast Louisiana where they have a *ton* of lightning pass through. Needless to say, all three of them are *very* happy. 🙂